halloween image

This is My Halloween Website


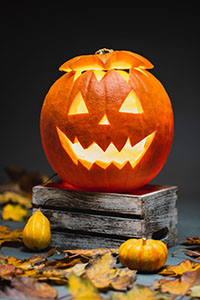
Halloween is a holiday celebrated each year on October 31, and Halloween 2022 will occur on Monday, October 31. The tradition originated with the ancient Celtic festival of Samhain, when people would light bonfires and wear costumes to ward off ghosts. In the eighth century, Pope Gregory III designated November 1 as a time to honor all saints. Soon, All Saints Day incorporated some of the traditions of Samhain. The evening before was known as All Hallows Eve, and later Halloween. Over time, Halloween evolved into a day of activities like trick-or-treating, carving jack-o-lanterns, festive gatherings, donning costumes and eating treats.

The tradition originated with the ancient Celtic festival of Samhain, when people would light bonfires and wear costumes to ward off ghosts. In the eighth century, Pope Gregory III designated November 1 as a time to honor all saints. Soon, All Saints Day incorporated some of the traditions of Samhain.


My Favorite Halloween Treat: Black Chocolate Witch Cake

Ingredients

The Black Chocolate Cake

The Buttercream Frosting

The Chocolate Ganache

For Decorating

Directions

  1. Make the Black Chocolate Cake: Heat oven to 350 degrees F and lightly coat four 9-inch round cake pans with cooking spray. Line the bottoms of the pans with parchment paper, then spray the parchment.
  2. In a large bowl, sift together the flour, sugars, cocoa powder, baking powder, baking soda, and salt.
  3. Using an electric mixer, in a second large bowl, whisk together the butter and oil. Add the ice cold water and whisk until well combined, 1 minute. Reduce mixer speed to low and add the eggs, one at a time, mixing until incorporated. Mix in the sour cream and vanilla. With the mixer running, gradually add the flour cocoa mixture.
  4. Divided the batter among the prepared pans (about 2 1/2 cups per pan). Tap each pan on a countertop a couple of times (this helps eliminate any air bubbles and evenly distribute the batter). Bake until a wooden pick inserted into the center comes out clean, 25 to 27 minutes. Transfer to a wire rack and let cool for 10 minutes before removing from pans to cool completely.
  5. Make the Buttercream Frosting: Using an electric mixer, beat butter on medium speed until creamy, about 2 minutes. Reduce mixer speed to low and gradually add confectioners' sugar, alternating with heavy cream. Mix in vanilla extract. Increase speed to high and beat until fluffy, about 2 minutes. Divided the frosting among 3 medium bowls (2 1/2 cups per bowl) and tint sing green, purple, and orange gel food coloring. Transfer each color to a separate resealable 1-quart plastic bag.
  6. Make the Chocolate Ganache: Place chocolate in a medium bowl. In a small saucepan, heat heavy cream until just bubbling around the edges. Pour the cream over the chocolate, stir once, then let sit for 5 minutes. Stir until completely melted and smooth. Cover with plastic and set aside until slightly thickened, about 30 minutes.
  7. Assemble the Cake: Using a large serrated knife, cut the rounded tops off each cake so they are level and even in thickness (save the tops of the cakes). Transfer one layer of cake to a 9-inch cake board.
  8. Snip 1/2 inch off a corner of the green frosting bag. Pipe the frosting around the top edge of the cake. Pipe the remaining green buttercream in the middle of the cake, then use an offset spatula to spread evenly; place another cake layer on top. Repeat with the purple icing, then the orange.
  9. Spoon the cooled ganache over the top, using the back of a spoon to coax the ganache slightly over the edges of the cake.
  10. Decorate the Cake: Place the cake on a platter and arrange the cake crumbs around the base of the cake. Arrange the cookie pieces and crumbs on top of the cake. Shape the fondant into the witch's hat and shoes, bats, pumpkin and crow.

How to Carve A Pumpkin

  1. Step 1. Begin with the right pumpkin. Choose one that's fresh, with a sturdy stem, no bruises and a flat bottom so it won't roll while you carve.
  2. Step 2. Start cutting from the bottom, not the top. Michael Natiello, pumpkin carving pro and creative director for The Great Jack-o'-Lantern Blaze, says cutting your "lid" from the bottom of the pumpkin helps prevent the sides from caving in later.
  3. Step 3. If you do carve from the top, cut out the lid on an angle. This way it won't drop inside the pumpkin when you put it back on top, like it would with a straight up-and-down cut. A boning knife should work well for this.
  4. Step 4. Scoop out all the pulp (and then some). You can buy a special "claw" for pumpkin gutting, but an ice cream scoop will do just fine. Thin the inner wall of the "face" area to 1ΒΌ-inch thick, so it will be easier to pierce the shell.
  5. Step 5. Start by making simple rough cuts. If you get the big pieces of pumpkin out of the way first, you can go back and clean up the edges of your design later.
  6. Step 6. Light it up. Place your candle (or candles) into your pumpkin before lighting. If you don't want to use votives, try Christmas lights, especially those that blink for a spooky appearance. Or, save yourself the stress and go with battery-operated votives instead.